Are you ready to dive into the colorful and relaxing world of embroidery? If you’ve ever admired a beautifully stitched design and thought, “I wish I could do that,” then you’re in the right place.
Embroidery pattern kits are the perfect way to start your creative journey. They offer everything you need, from fabric to thread, and guide you step-by-step to create stunning artwork with your own hands. But how do you get started, and what should you look out for to ensure your project turns out just right?
We’ll break down the process in simple, easy-to-follow steps that will boost your confidence and keep you excited about your new hobby. Let’s unlock the secrets of embroidery together and transform a simple kit into a masterpiece you’ll be proud of.
Credit: cleverpoppy.com
Choosing The Right Kit
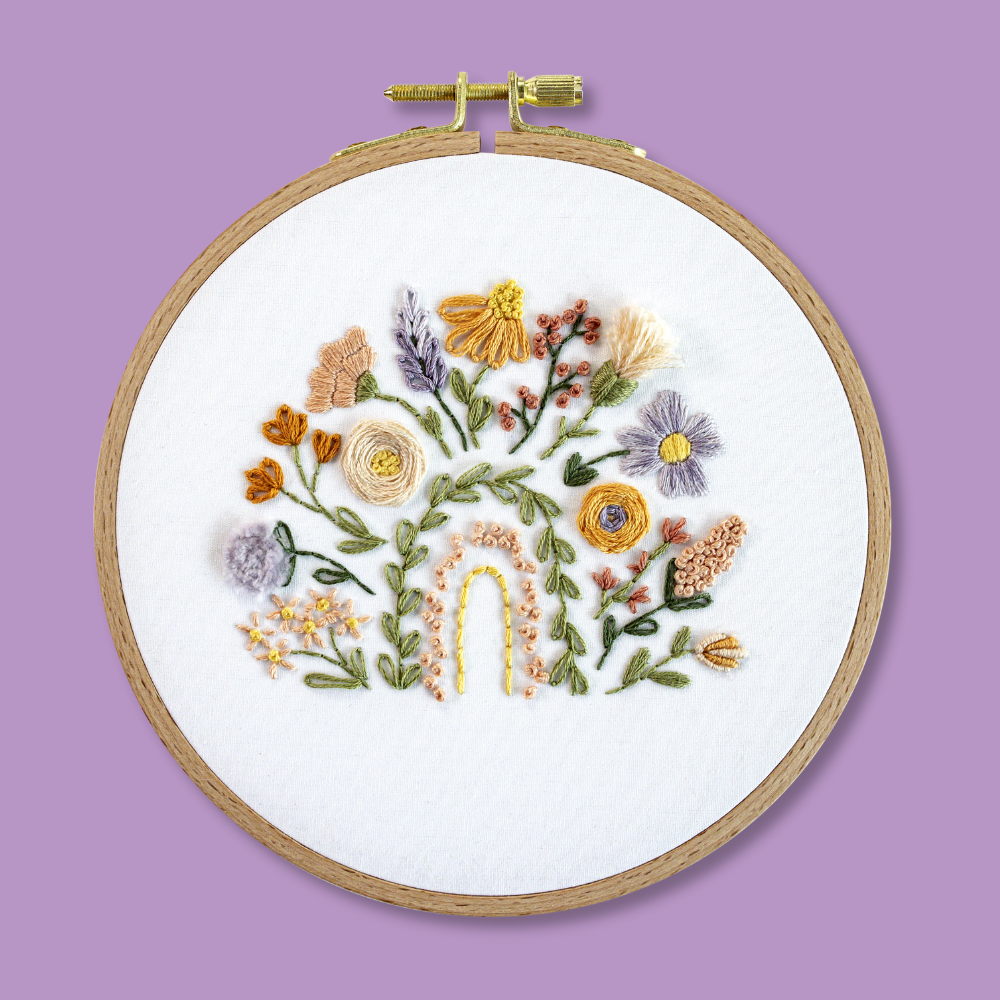
Selecting the perfect embroidery pattern kit involves considering design complexity and your skill level. Choose kits with clear instructions, vibrant threads, and high-quality fabric. Ensure the pattern excites your creativity and matches your personal style.
Choosing the right embroidery pattern kit is crucial for a successful project. The variety of kits available can be overwhelming. Knowing what to look for makes the process easier and more enjoyable.Beginner Vs. Advanced
Selecting a kit depends on your skill level. Beginners should choose kits with basic designs. These kits often include clear instructions and fewer stitches. Advanced crafters might prefer kits with intricate patterns. These challenge your skills and creativity.Materials Included
Check what materials come with the kit. Most kits include fabric, thread, needles, and a hoop. Ensure the fabric is suitable for your design. Quality thread ensures durability and vibrant colors. Some kits offer extra embellishments like beads or sequins.Design Complexity
Consider the design complexity before purchasing. Simple patterns are ideal for practicing basic stitches. Complex designs require advanced techniques and patience. Detailed designs offer a rewarding experience upon completion. Choose a design that matches your interest and skill level.Essential Tools And Materials
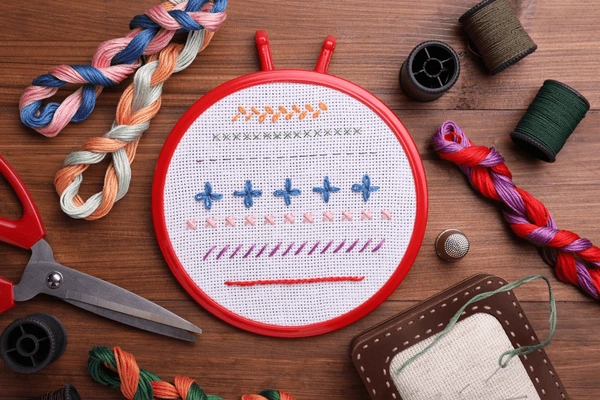
Embroidery kits require essential tools and materials for success. Needles, embroidery hoops, and colorful threads are key. Fabric and scissors complete your setup, making your stitching journey smooth and enjoyable.
Embarking on an embroidery journey is both exciting and fulfilling. Mastering the craft requires some essential tools and materials. These basics ensure your projects turn out beautifully. Let’s delve into what you need to start.Needles And Threads
Embroidery needles are different from regular sewing needles. They have larger eyes to accommodate thicker threads. Choose needles based on the fabric and thread type. Threads come in various textures and colors. Cotton, silk, and wool are popular choices. Each offers a unique finish to your work. Mixing threads can add depth and interest to your designs.Hoops And Fabric
Hoops hold your fabric taut. This helps maintain tension while stitching. Wood and plastic hoops are common options. Choose a size that fits your project. Fabric selection plays a crucial role too. Cotton and linen are beginner-friendly. They are easy to work with and provide a smooth surface. Always wash and iron your fabric before starting.Additional Supplies
A few extra tools make the process smoother. Scissors are essential for cutting threads neatly. Embroidery scissors have sharp, fine points. A thimble protects your finger from needle pricks. Marking tools help transfer patterns onto the fabric. Water-soluble pens and pencils are popular choices. A needle threader is useful for threading finer needles. Keeping these tools handy enhances your embroidery experience.Preparing Your Work Area
Creating a tidy work area boosts focus and efficiency for embroidery projects. Arrange materials neatly and ensure good lighting. Keep tools within reach to streamline your crafting process.
Preparing your work area is crucial for embroidery success. A tidy, comfortable space boosts focus and creativity. It helps in executing intricate designs with precision. Let’s explore how to set up your workspace for an embroidery pattern kit.Lighting And Comfort
Good lighting is essential for embroidery work. Choose a spot with natural light. A table near a window is ideal. If natural light is scarce, use a bright desk lamp. LED lamps with adjustable settings work well. Ensure your chair is comfortable too. A cushioned chair with back support prevents strain. Comfort keeps you focused on your project longer.Organizing Supplies
Keep all supplies within reach. Arrange threads, needles, and scissors neatly. Use small containers or trays for organization. Label them for easy access. Keep your pattern kit in a dedicated spot. A tidy area saves time and reduces frustration. Knowing where each item is boosts efficiency.Setting Up The Hoop
Setting up the hoop is a vital step. Choose the right size hoop for your fabric. Loosen the screw to separate the hoop rings. Place your fabric over the inner ring. Position the outer ring on top. Tighten the screw to secure the fabric. Ensure the fabric is taut. A well-set hoop ensures smooth stitching.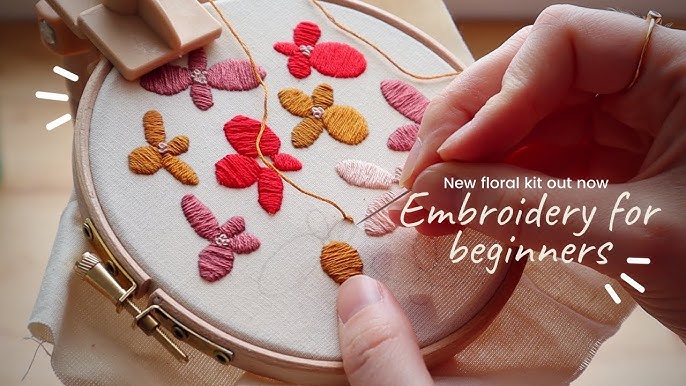
Credit: www.youtube.com
Reading The Pattern
Embarking on an embroidery pattern kit journey can be fun. The first step is reading the pattern. Understanding the pattern is crucial for creating your masterpiece. It guides you through each stitch and color choice. Let’s delve into the essentials of reading your embroidery pattern.
Understanding Symbols
Patterns use symbols to indicate different stitches. Each symbol represents a specific type of stitch or action. Symbols help in visualizing the embroidery process. Familiarize yourself with common symbols like crosses or dots. They guide your needlework direction and style.
Color Codes And Stitch Types
Embroidery kits come with color codes. These codes match threads to pattern colors. Each code is essential for color accuracy. Pay attention to these codes for a vibrant design. Stitch types vary in complexity. Some are simple, others require more focus. Patterns usually indicate the stitch type next to symbols.
Following Instructions
Instructions are the backbone of embroidery success. They provide step-by-step guidance. Start by organizing your threads and needles. Follow instructions carefully for a smooth process. Patterns may suggest techniques or tips. These tips can enhance your embroidery skills.
Basic Stitch Techniques
Discover the charm of an embroidery pattern kit through simple stitch techniques. Begin with basic stitches like the running stitch or backstitch. These form the foundation for creating beautiful designs with ease.
Embroidery is an enjoyable and creative hobby. It allows you to create beautiful designs on fabric. Learning the basic stitch techniques is essential for beginners. These stitches form the foundation of any embroidery project. By mastering them, you can bring your patterns to life. Here, we explore three essential techniques: Backstitch, Satin Stitch, and French Knots.Backstitch
The backstitch is a simple and versatile technique. It’s perfect for outlining shapes and adding details. Start by bringing the needle up through the fabric. Insert the needle one stitch length away. Pull it through to create a continuous line. This stitch is ideal for creating clean, strong lines. It’s often used for text or borders. Practice will make your lines neat and smooth.Satin Stitch
The satin stitch creates smooth, filled areas. It’s great for filling shapes with solid color. Bring the needle up at one edge of the shape. Insert it directly across at the opposite edge. Continue this process side by side. The stitches should lie flat and close together. This technique requires patience and precision. It adds a rich texture to your embroidery.French Knots
French knots are small, raised stitches. They add texture and dimension to your work. Start by bringing the needle up through the fabric. Wrap the thread around the needle twice. Insert the needle back near the starting point. Pull the thread slowly to form a knot. These knots are perfect for floral centers or decorative accents. With practice, your knots will become uniform and tidy. Master these techniques to enhance your embroidery skills. These stitches are the building blocks for more complex designs. Enjoy the process and watch your creations come to life.Advanced Stitch Techniques
Embroidery is a timeless craft, offering endless creative possibilities. Advanced stitch techniques elevate your projects, adding depth and texture. These techniques require practice and patience. But the results are stunning. Let’s explore some of these advanced stitches.
Chain Stitch
The chain stitch creates a series of loops resembling a chain. This stitch is perfect for outlining patterns or filling areas. Start with a single loop and thread the needle through. Continue making loops, pulling the thread gently. The stitch flows smoothly, creating elegant curves.
Bullion Knot
Bullion knots add texture and dimension to your embroidery. They are ideal for floral designs or decorative accents. Wrap the thread around the needle multiple times. Pull the needle through the wraps, forming a neat coil. It may take practice, but the effect is worth it.
Couching
Couching involves securing a thread with small stitches. This technique is great for bold lines or designs. Lay a thick thread on the fabric. Use small stitches to hold it in place. The result is striking, allowing for creative color combinations.
Common Mistakes To Avoid
Embroidery is a delightful craft that can be relaxing and rewarding. Yet, beginners often face challenges that affect the final outcome. Understanding common mistakes is crucial to enhance your embroidery skills. Let’s explore some frequent pitfalls and learn how to avoid them.
Tension Issues
Maintaining the right tension is key in embroidery. Too tight stitches can distort the fabric. Loose stitches might look sloppy. Check your grip frequently. Adjust if necessary. Practice makes perfect.
Thread Fraying
Thread fraying can spoil your work. Use quality threads to prevent this. Cut threads at an angle. This reduces fraying chances. Keep your threads clean and untangled. Proper storage helps.
Pattern Alignment
Aligning your pattern is essential. Misalignment can ruin the design. Take time to secure your fabric. Double-check the position before stitching. Use guides or markings. A well-aligned pattern looks professional.
Caring For Your Finished Piece
Protect your finished embroidery by gently washing it in cold water. Dry it flat to avoid distortion. Store it in a cool, dry place away from direct sunlight to preserve its colors.
Embroidery is an art that brings joy and beauty. Once you’ve completed your embroidery pattern kit, it’s essential to care for your masterpiece. Proper care ensures your hard work remains vibrant and beautiful for years. Let’s explore how to maintain your finished piece with ease.Washing And Ironing
Before washing, check the thread and fabric instructions. Use cold water and mild soap for cleaning. Gently hand wash to preserve colors and threads. Avoid wringing or twisting the fabric. Lay your piece flat on a towel to dry. To iron, place a clean cloth over the embroidery. Use a low heat setting. Gently press to remove wrinkles without damaging the threads.Framing And Display
Choose a frame that complements your artwork. Ensure it fits the size of your piece. Acid-free materials in the frame protect the fabric. Mount your embroidery using pins or a stretching technique. This keeps it taut and smooth. Hang your framed piece away from direct sunlight. Sunlight can fade the vibrant colors over time.Long-term Preservation
Store your embroidery in a cool, dry place. Use acid-free tissue paper for extra protection. Roll the fabric, rather than folding, to avoid creases. Keep it in a breathable container to prevent moisture buildup. Avoid storing in plastic bags. They can trap moisture and damage the fabric. Regularly check your stored pieces for signs of wear or pests. `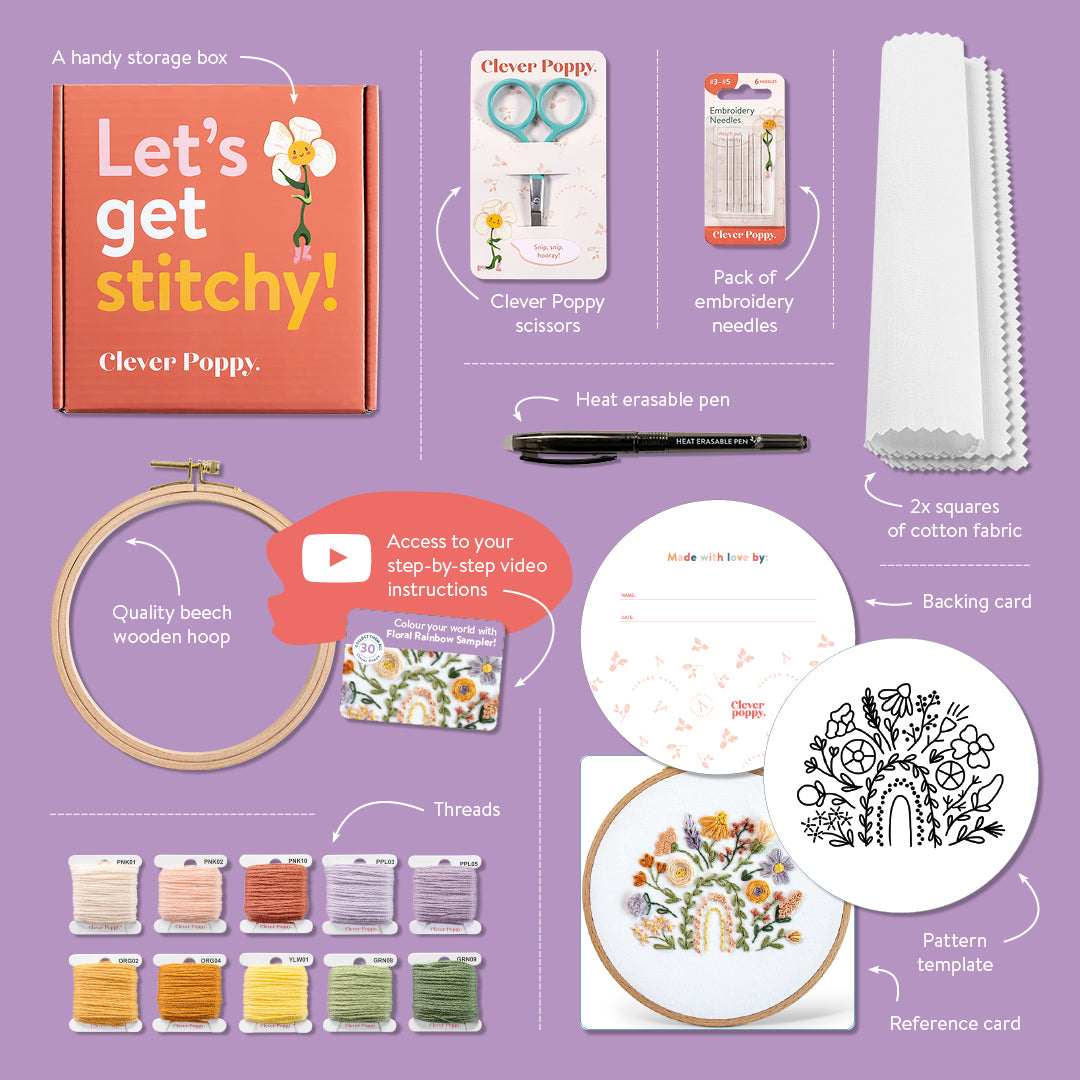
Credit: cleverpoppy.com
Frequently Asked Questions
What Is Included In An Embroidery Kit?
An embroidery kit typically includes fabric, thread, needles, and a pattern. Some kits also provide an embroidery hoop. These components are essential for starting your embroidery project. Each kit is designed to offer everything you need to create beautiful designs easily.
How Do I Start My Embroidery Project?
Begin by reading the instructions in your kit. Secure the fabric in the hoop. Thread the needle and follow the pattern. Start with simple stitches and gradually work on complex ones. Taking your time ensures better results.
Can Beginners Use Embroidery Pattern Kits?
Yes, embroidery kits are perfect for beginners. They offer step-by-step guidance and include all necessary materials. Choose kits with simpler patterns to ease into the craft. As you gain confidence, you can try more intricate designs.
How Long Does It Take To Complete A Kit?
The time varies based on the complexity of the pattern and your experience. Simple kits can take a few hours to complete. More detailed projects might require several days. Patience and practice are key to achieving beautiful results.
Conclusion
Creating an embroidery pattern kit can be fun and rewarding. Follow each step carefully to ensure success. Choose your favorite pattern, gather your materials, and start stitching. Practice makes perfect, so don’t worry about mistakes. Your skills will improve with time.
Enjoy the process and watch your design come to life. Share your finished project with friends or family. It’s a great way to showcase your creativity. Embroidery offers a relaxing escape and a sense of accomplishment. Dive in and start your embroidery journey today.
Happy stitching!
