Are you looking to dive into the world of embroidery but feel unsure about where to start? Embroidery kits are the perfect introduction to this calming and creative hobby.
They come with everything you need to get started, from colorful threads to detailed patterns, making it easy for beginners and satisfying for seasoned crafters. Imagine the joy of creating beautiful, handmade pieces that you can proudly display or gift to loved ones.
In this guide, you’ll discover simple steps to transform your embroidery kit into a work of art. You’ll gain confidence, have fun, and unleash your creativity. Ready to turn a simple kit into a masterpiece? Let’s get started.
Choosing The Right Embroidery Kit
Choosing the right embroidery kit is vital for beginners. It sets the tone for your crafting journey. With the right kit, you can enjoy a smooth, fulfilling experience. Dive into the world of embroidery with confidence. Let’s explore the key factors to consider when selecting an embroidery kit.
Types Of Kits Available
Embroidery kits come in various types. Some are meant for beginners. Others cater to advanced crafters. Beginner kits often include pre-printed designs. Advanced kits offer more complexity. Choose a kit that matches your skill level. Assess your needs and preferences. This will guide you to the perfect choice.
Materials Needed
Every embroidery kit has essential materials. You’ll need fabric, needles, and threads. Some kits include hoops and scissors. Others may provide a pattern guide. Ensure the kit has all you need. Check for quality materials. They affect the final result and durability. Investing in a good kit pays off.
Understanding Basic Stitches
Embroidery is a timeless art. It starts with learning basic stitches. Each stitch adds texture and beauty to your fabric. Knowing these stitches helps you create wonderful designs.
Below are some basic stitches. These are essential for any embroidery kit. Practice them to enhance your skills.
Running Stitch
The running stitch is simple and versatile. It involves making small, even stitches. Use it for outlines and simple patterns. It’s like a dashed line on fabric. Make sure the stitches are equal in length. This ensures a neat appearance.
Backstitch
The backstitch is perfect for strong lines. It creates a continuous, solid line. Start by stitching forward. Then, move back to fill the gaps. This stitch is great for text and outlines. It adds durability to your embroidery.
French Knot
The French knot adds texture and dimension. It’s ideal for eyes or flower centers. Wrap the thread around the needle. Pull it through the fabric to form a knot. Practice makes perfect with this stitch. It adds elegance to your work.
Satin Stitch
The satin stitch fills areas with smoothness. It’s used to fill in shapes. Keep stitches close for a satin-like finish. It requires patience and precision. This stitch creates a polished look. Perfect for leaves, petals, and solid shapes.
Preparing Your Embroidery Area
Creating a dedicated space for embroidery boosts focus and creativity. A well-prepared area makes the process more enjoyable. Let’s dive into setting up your perfect embroidery space.
Setting Up Your Workspace
Choose a quiet spot with good lighting. Natural light is best, but a lamp will do. A sturdy table or desk works well for your projects. Ensure your chair is comfortable for long sessions. A cushioned seat can help. Keep your workspace clean and clutter-free. A tidy area enhances concentration and reduces mistakes.
Organizing Tools And Materials
Arrange your tools for easy access. Use a small box or caddy for needles and threads. A pin cushion keeps needles safe and handy. Sort threads by color in separate containers. This saves time when selecting colors. Keep scissors and hoop within reach. Having everything close saves you from unnecessary movement. Use a notebook to track designs and notes. This helps keep your projects organized and on track.

Credit: www.reddit.com
Starting Your Embroidery Project
Embarking on your first embroidery project is a rewarding experience. The journey begins with a clear design and the right tools. Each stitch tells a story, and with patience, you can create something beautiful.
Transferring The Design
Start by selecting your embroidery design. Place the fabric on a flat surface. Use a light pencil or washable pen to trace the design onto the fabric. Ensure lines are clear and easy to follow. This step sets the foundation for your work.
Threading The Needle
Choose the thread color that matches your design. Cut a length of thread about 18 inches long. Hold the needle with one hand and the thread with the other. Carefully insert the thread through the needle’s eye. Pull it halfway through, leaving an equal amount on each side. Tie a knot at the end of the thread for stability. A properly threaded needle ensures smooth stitching.
Techniques For Stitching
Embroidery kits offer a fun way to learn stitching techniques. Begin by choosing a kit with clear instructions. Organize your threads and follow the patterns step-by-step for best results.
Embroidery is an art that blends creativity and skill. Understanding the basic techniques for stitching can make your embroidery project enjoyable. These techniques form the foundation of your craft. They enhance the beauty of your design. Let’s explore how to follow the pattern and maintain tension in your stitches.Following The Pattern
Following the pattern is crucial in embroidery. Begin by placing your fabric in a hoop. This keeps it tight and easy to work with. Next, examine your embroidery kit’s pattern. The pattern guides the placement of your stitches. Use a water-soluble pen to mark key points on your fabric. This helps you stay aligned with the design. Follow the color chart if provided. It tells you which color to use for each part of the design. Always double-check your work. This ensures you are following the pattern correctly.Maintaining Tension
Maintaining tension is vital for neat stitches. Keep your fabric taut in the hoop. This prevents your stitches from becoming loose. Hold your thread with a gentle grip. Too tight, and the fabric may pucker. Too loose, and the stitches may sag. Practice makes perfect. Consistent tension leads to even stitches. Adjust the hoop if the fabric loosens during stitching. Regular adjustments maintain the necessary tension. Always check the back of your work. It should look as neat as the front. This indicates balanced tension.Troubleshooting Common Issues
Embarking on an embroidery project can be exciting yet challenging. Every crafter faces hurdles. From fixing mistakes to tangled threads, these issues can frustrate. With the right tips, these problems can be easily managed. Below, we explore solutions to help you enjoy a smoother embroidery experience.
Fixing Mistakes
Mistakes happen, even to seasoned embroiderers. The key is not to panic. First, gently unpick the incorrect stitches. Use a seam ripper for precision. This minimizes fabric damage. Next, rethread your needle and start again. Remember, practice makes perfect.
Sometimes, stitches might look uneven. Adjust thread tension for uniformity. This enhances the overall appearance. If threads overlap, separate them carefully. This prevents fabric distortion. Learning to fix mistakes improves your skills.
Dealing With Tangled Threads
Tangled threads can slow progress. Start by using shorter thread lengths. Long threads tangle more easily. Thread conditioners can also help. They reduce friction, making threads glide smoothly.
When tangling occurs, gently untangle using your fingers. Avoid pulling hard, which can cause knots. If knots form, use a needle to tease them apart. Patience is key here. Preventing tangles saves time and stress.
Proper storage keeps threads tidy. Use bobbins or thread organizers. This reduces tangling and ensures easy access. Keeping threads organized promotes a pleasant crafting experience.
Finishing Touches
Completing an embroidery kit is a rewarding experience. It’s the moment to see your work come alive. The final steps add polish and professionalism. They ensure your masterpiece is ready for display or gift-giving.
From securing stitches to washing and ironing, each step matters. These finishing touches enhance the beauty of your embroidery.
Securing Your Stitches
Properly securing your stitches is crucial. Loose threads can ruin the design. Start by tying knots on the back of the fabric. Make them tight but not too bulky. This keeps the fabric smooth.
Use a needle to weave the thread into nearby stitches. This technique hides the ends and strengthens the embroidery. Trim any excess thread for a clean look.
Washing And Ironing
Washing your embroidery removes dirt and oils. Use lukewarm water and mild soap. Be gentle to avoid damaging the stitches. Rinse thoroughly and lay the fabric flat to dry.
Ironing is the next step. Place the fabric on a soft towel. Use a steam iron at a low setting. Press gently to avoid flattening the stitches. This process keeps your embroidery crisp and vibrant.
Credit: penguinandfish.com
Caring For Your Completed Embroidery
Completing an embroidery piece feels rewarding. It’s important to care for it well. Proper care ensures it stays beautiful and lasts long. You’ll learn how to store and showcase your work. This keeps your embroidery looking fresh and vibrant.
Storage Tips
Store your embroidery in a dry place. Avoid direct sunlight. Sunlight can fade the colors. Use acid-free tissue paper for wrapping. This prevents discoloration. Keep the piece flat. Avoid folding it to prevent creases.
If you frame it, ensure a tight seal. This keeps dust away. For unframed pieces, a fabric box is ideal. It provides protection and air circulation. Regularly check your stored embroidery. This helps catch any issues early.
Showcasing Your Work
Display your embroidery proudly. Use a frame that complements the design. Glass frames protect against dust. Consider UV-protective glass. This guards against fading.
Hang the frame away from direct sunlight. Choose a spot with indirect light. Your embroidery will shine without damage. Rotate pieces on display. This helps even out any light exposure.
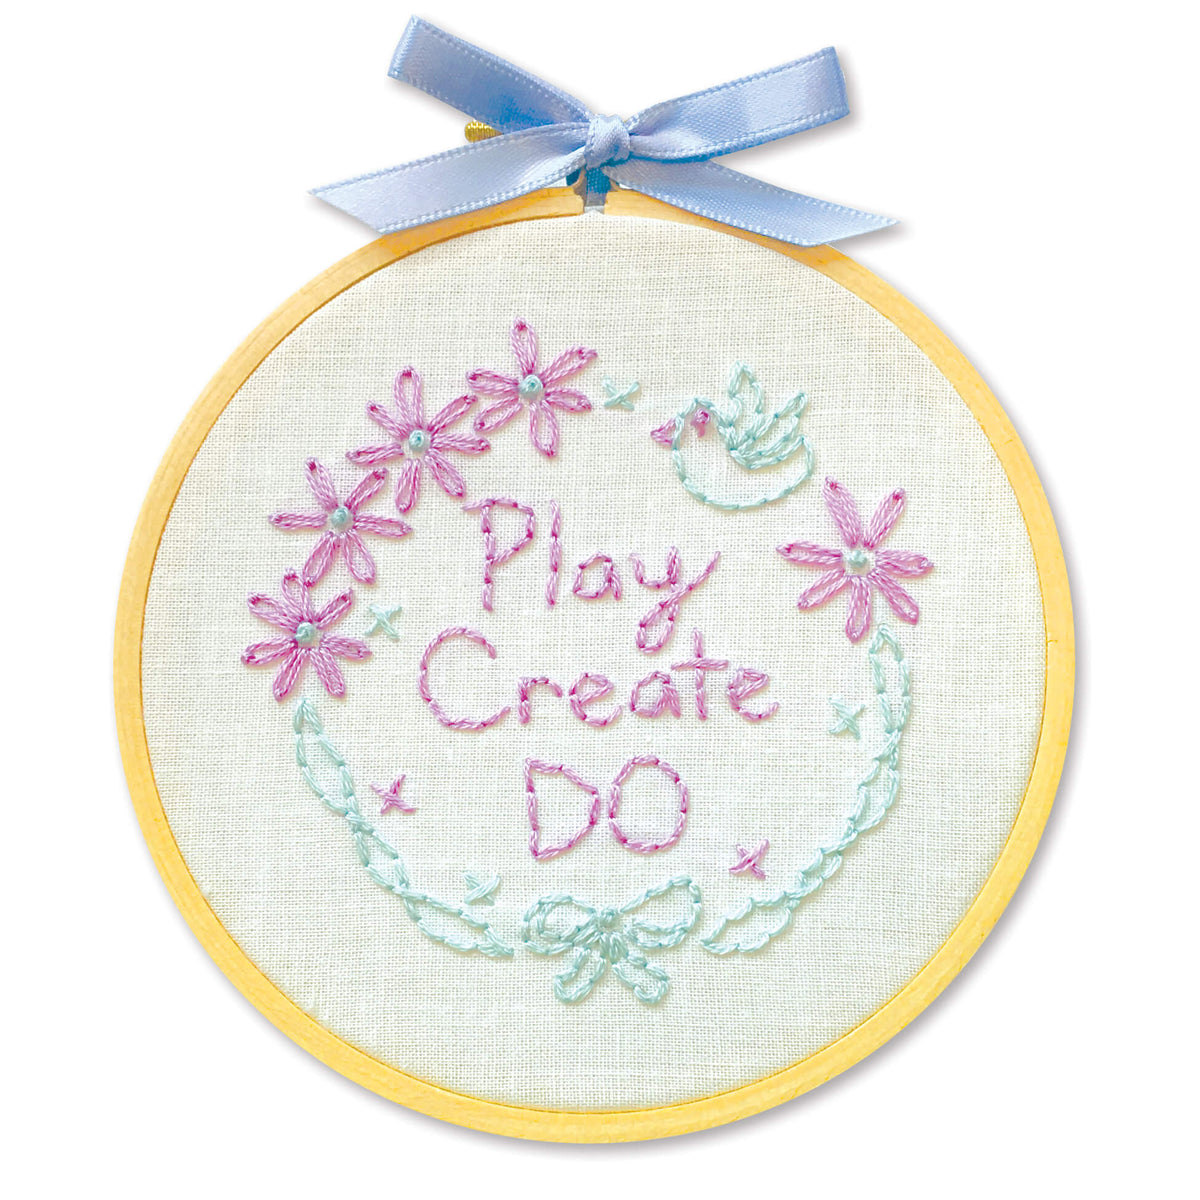
For a modern touch, use embroidery hoops. Hang them on walls as art. They add charm and character to your space. Your embroidery deserves to be admired and appreciated.
Credit: www.reddit.com
Frequently Asked Questions
What Is An Embroidery Kit?
An embroidery kit includes all the essentials for starting embroidery. Typically, it contains fabric, threads, needles, and a pattern. Some kits may also include a hoop and instructions. It’s designed for beginners to easily create beautiful designs without needing additional materials.
How Do I Start With An Embroidery Kit?
To start, gather all the items in your kit. Follow the included instructions or pattern carefully. Begin by threading the needle and securing the fabric in a hoop, if included. Use the stitches suggested in the instructions to complete the design.
What Types Of Stitches Are Used In Embroidery?
Common embroidery stitches include the backstitch, satin stitch, and French knot. Each stitch creates different textures and effects. Most kits provide a guide to these stitches. Practice them on a scrap piece of fabric before starting your main project.
How Long Does It Take To Complete An Embroidery Kit?
The time to complete an embroidery kit varies by design complexity. A simple pattern might take a few hours, while intricate ones can take days. It’s important to work at your own pace and enjoy the process.
Conclusion
Completing an embroidery kit brings joy and satisfaction. You learn new skills and create beautiful art. Follow the steps, and soon you’ll see progress. Each stitch adds to your masterpiece. Enjoy the process, not just the end result. Mistakes happen, but they teach valuable lessons.
Practice improves your technique over time. Share your creations with friends and family. They will admire your hard work. Embroidery offers a relaxing escape from daily stress. So, pick up your kit and start stitching. Let your creativity shine through each thread.
Happy embroidering!


