Are you tired of tangled cords cluttering your space? Imagine having a stylish, handmade holder that keeps your cotton cords neat and ready to use.
With this free DIY macrame cotton cord holder pattern, you can create a beautiful, functional piece that fits perfectly in your craft area. Whether you’re a beginner or experienced, this simple project will add charm to your workspace and make your crafting more enjoyable.
Ready to transform your cords into an organized work of art? Let’s dive in!
Credit: www.etsy.com
Materials Needed
Gathering the right materials is the first step for your DIY macrame cotton cord holder project. Having everything ready makes the process smooth and enjoyable. This section explains what you need to start creating your holder.
Choosing The Right Cotton Cord
Select cotton cord that is soft and strong. A thickness between 3mm and 5mm works best. Natural cotton cords give a clean, classic look. Avoid synthetic cords as they are less flexible and harder to knot. Color choice depends on your style, but neutral tones suit most designs.
Essential Tools
Prepare basic tools before you start. Scissors with sharp blades cut cords cleanly. A measuring tape helps keep your knots even. A clipboard or macrame board holds your work steady. Pins or clips keep cords in place as you knot.
Optional Accessories
Consider adding beads or wooden rings for decoration. A comb can help untangle cords and keep them smooth. Fabric glue strengthens knots and prevents fraying. A small spray bottle with water can soften stiff cords before use.
Basic Macrame Knots
Basic macrame knots form the foundation of every project. They are simple to learn and easy to use. These knots create patterns and hold the design together. Knowing them helps you make beautiful cotton cord holders with ease.
Square Knot
The square knot is strong and looks neat. It uses two cords that wrap around each other. This knot creates a flat, wide pattern. It works well for the main body of your holder. You can repeat it to make long rows.
Lark’s Head Knot
The lark’s head knot is perfect to start your work. It attaches cords to a ring or a base cord. This knot is simple and quick to tie. It helps hold all the cords in place. Use it to set up your project easily.
Half Hitch Knot
The half hitch knot adds style and texture. It wraps one cord around another in a spiral way. This knot forms lines and curves in your design. It is good for borders or decorative touches. Practice this knot to add detail to your holder.
Step-by-step Pattern
Follow this simple step-by-step pattern to create your own macrame cotton cord holder. This guide breaks down each part clearly. You will understand how to prepare cords, start the base, create the holder body, and add finishing touches. Perfect for beginners and those who want a neat, useful craft.
Preparing Your Cords
Cut your cotton cords to the needed lengths. Use soft, durable cotton for best results. Arrange the cords side by side. Make sure they are smooth and untangled. This step ensures an even and tidy final product.
Starting The Base
Begin by folding cords in half. Tie a strong knot at the fold to make a loop. This loop will hold your cord holder. Separate cords evenly on both sides. Start making square knots to form the base. Keep knots tight and consistent.
Creating The Holder Body
Use alternating square knots to build the body. Work row by row for a neat design. Keep the tension even to avoid uneven shapes. Add decorative knots if you want a unique look. Continue until you reach the desired height.
Finishing Touches
Tie a final knot to secure the pattern. Trim any extra cord ends evenly. Use a lighter to gently melt ends and prevent fraying. Check the holder for tightness and shape. Your DIY macrame cotton cord holder is ready to use or gift.

Credit: persialou.com
Customizing Your Holder
Customizing your macrame cotton cord holder makes it truly yours. Personal touches bring charm and uniqueness. Small changes can reflect your style and personality.
Try different ways to decorate and adjust your holder. Each choice changes the look and feel. Customizing helps your holder fit perfectly in your space.
Adding Beads And Charms
Beads and charms add a lovely touch to your holder. Choose wooden, glass, or metal beads for variety. Slide them onto the cords before knotting. Charms can hang from the ends or between knots. This adds texture and visual interest easily.
Using Different Cord Colors
Mixing cord colors creates a vibrant or soft look. Pick colors that match your room or mood. Use two or three shades for a balanced design. Color changes can highlight knots and patterns. This simple change makes your holder stand out.
Adjusting Size And Length
Change the size to fit your space or needs. Cut longer cords for a bigger holder or shorter for compact use. Adjust the length of hanging cords for different styles. Measure your area first to avoid mistakes. Proper sizing ensures your holder looks neat and works well.
Tips For Beginners
Starting a DIY macrame cotton cord holder project can be fun and relaxing. Beginners often face small challenges. These tips help you avoid frustration and enjoy the process. Keep your work neat and steady. Practice makes your knots stronger and your design cleaner.
Avoiding Common Mistakes
Cut your cords longer than you think you need. Running out of cord stops your project. Check your knot patterns carefully before tightening. Mistakes are easier to fix when loose. Take breaks to avoid rushing and making errors. Keep your workspace clean to prevent tangles.
Maintaining Tension
Keep your cords tight but not too tight. Too loose knots look messy and weak. Too tight knots can damage the cord. Hold the cord firmly while tying each knot. Adjust tension evenly throughout your project. This keeps your holder strong and neat.
Practicing Knots
Start with simple knots like square knots and half hitch. Practice knots on scrap cords before your project. Repeat knots several times to build confidence. Watch tutorial videos to see knot techniques clearly. The more you practice, the better your work looks.

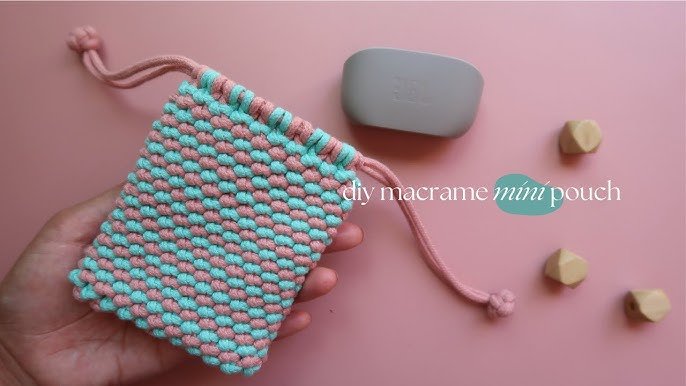
Credit: www.youtube.com
Care And Maintenance
Taking care of your DIY macrame cotton cord holder keeps it looking fresh and strong. Proper care helps the cotton cord last longer and maintain its beauty. Small steps in cleaning and storing make a big difference.
Cleaning Your Macrame Holder
Dust and dirt can build up on your macrame holder over time. Use a soft brush or cloth to gently remove surface dust. For deeper cleaning, hand wash with mild soap and cold water. Avoid harsh chemicals or bleach, which can weaken the cotton fibers. Let it air dry flat to keep its shape intact.
Storage Suggestions
Store your macrame holder in a dry place away from direct sunlight. Sun can fade the cotton and make it brittle. Avoid folding it tightly to prevent creases. Hanging it or laying it flat works best. Keep it away from moisture to stop mold or mildew growth.
Frequently Asked Questions
What Materials Are Needed For A Macrame Cotton Cord Holder?
You need cotton cord, scissors, a measuring tape, and a wooden ring or dowel. Optionally, use beads for decoration. These simple materials are affordable and easy to find in craft stores or online.
How Do I Start The Macrame Cotton Cord Holder Pattern?
Begin by cutting multiple cotton cords to equal lengths. Attach cords to the wooden ring using a lark’s head knot. Follow the step-by-step knotting instructions to create the design.
Is This Macrame Pattern Suitable For Beginners?
Yes, this pattern is beginner-friendly. It uses basic knots like square and half hitch knots. Clear instructions make it easy for anyone new to macrame to follow along.
Can I Customize The Cord Holder Design?
Absolutely! You can change cord colors, add beads, or adjust the size. Personalizing your holder makes it unique and fits your style or space perfectly.
Conclusion
Creating your own macrame cotton cord holder is a fun and simple project. This free pattern guides you step-by-step. You can keep your cords neat and organized with it. Plus, it adds a handmade touch to your space. Grab some cotton cord and start crafting today.
Enjoy making something useful with your own hands. This project suits all skill levels. Try it, and see how easy macrame can be!