Imagine watching your child’s eyes light up as they create beautiful patterns with their own hands. Embroidery isn’t just about stitching; it’s a gateway to creativity, patience, and joy.
If you’re wondering how to introduce this delightful craft to your kids, you’ve come to the right place. By choosing the right embroidery kit, you can turn a quiet afternoon into a magical exploration of colors and textures. You’ll discover how easy it is to start, even if you’ve never threaded a needle before.
Let’s dive into the world of embroidery for kids, where imagination meets skill, and learn how to set up the perfect kit that will captivate your young ones from the very first stitch.

Credit: littlestitchybee.ca
Choosing The Right Embroidery Kit
Embroidery kits for kids are a delightful way to spark creativity. Choosing the right kit is crucial for a fun and successful experience. Consider age, materials, and skill level to make the best choice. Here’s how to select the perfect embroidery kit for your child.
Age-appropriate Designs
Young kids need simple patterns. Designs with large shapes are easier for them. Older kids can handle more detailed artwork. Look for kits that match their age and interests. This keeps them engaged and excited about the project.
Material Considerations
Materials matter in embroidery. Kits with soft fabrics and threads are ideal for kids. Wool and cotton are gentle on small hands. Avoid kits with sharp needles for safety. Ensure all materials are safe and suitable for children.
Skill Level
Start with beginner kits for new embroiderers. These kits have easy instructions and basic designs. Intermediate kits challenge experienced kids. They include complex patterns and techniques. Match the kit to your child’s skill level for enjoyment.

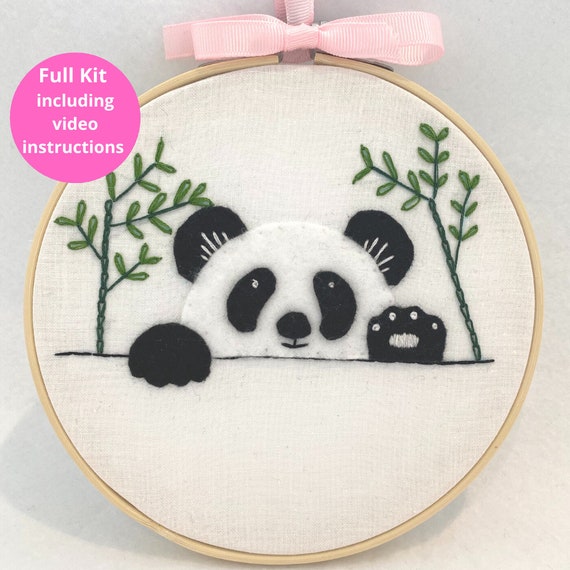
Credit: www.etsy.com
Gathering Essential Supplies
Embroidery kits for kids offer a creative and fun activity. Before diving into stitching, gathering essential supplies is crucial. With the right tools, children can enjoy crafting while learning new skills. This guide will help you assemble the perfect kit to inspire young embroiderers.
Needles And Threads
Choose needles with blunt tips for safety. Size 5 or 7 embroidery needles work well for kids. Ensure the needles are easy to handle. Opt for colorful threads to spark interest. Cotton and silk threads are ideal for beginners. They are smooth and easy to work with.
Hoops And Frames
Hoops help keep fabric taut. Select plastic or wooden hoops for durability. Six-inch hoops are perfect for small hands. Frames offer stability and ease during stitching. Lightweight frames are suitable for children. They can comfortably hold them while embroidering.
Instructional Guides
Guides simplify the learning process. Choose guides with simple patterns and designs. Visual instructions are more engaging for young minds. Include step-by-step pictures and tips. Clear instructions boost confidence and creativity. A good guide transforms the learning experience.
Setting Up A Workspace
Creating a kid-friendly embroidery workspace involves organizing materials like needles, threads, and fabric. Ensure the area is brightly lit and comfortable. Provide easy-to-follow instructions and inspiration to spark creativity.
Setting up a workspace for embroidery can spark creativity in kids. A well-organized area encourages learning and focus. It helps kids enjoy the process more. Creating a dedicated space for embroidery is essential.Organizing Tools
Start by gathering all necessary tools like needles, threads, and hoops. Keep them in a box or a small drawer. Use labeled containers for easy access. This helps kids find what they need quickly. A neat setup saves time and reduces frustration.Creating A Comfortable Environment
Ensure the workspace is well-lit and cozy. Natural light is ideal for better visibility. Add a soft chair for comfort during long sessions. A small table for placing materials can be very helpful. Consider adding cushions for extra comfort.Safety Precautions
Safety is crucial when kids handle embroidery tools. Keep sharp objects like needles in a separate, secure container. Teach kids how to use scissors safely. Make sure they know to store tools properly after use. Consider child-friendly scissors for added safety.Introducing Basic Techniques
Starting an embroidery kit for kids can be a fun activity. Introducing basic techniques is key to making this creative process enjoyable. Kids love exploring new crafts, and embroidery offers a chance to learn and express creativity. Understanding simple stitch patterns and thread management can make the experience smoother. Troubleshooting common issues will help avoid frustration and keep kids engaged. Let’s dive into these essential techniques!
Simple Stitch Patterns
Begin with easy stitch patterns. The running stitch is a great start. It involves straight lines and is easy to follow. The backstitch is another simple pattern. It creates a solid line and is useful for outlines. Teach kids the cross-stitch next. It’s perfect for filling spaces with color. These basic stitches help build confidence in young embroiderers.
Thread Management Tips
Proper thread management is essential. Use short lengths of thread to prevent tangling. Keep threads organized by color. Small containers or boxes work well. Teach kids to thread the needle carefully. Show them how to secure the thread with a knot. These tips make embroidery less messy and more enjoyable.
Troubleshooting Common Issues
Embroidery can have some challenges. Threads may tangle or knots can form. Teach kids to gently untangle threads. Show them how to remove knots by carefully pulling the thread. Needles may fall or get lost. Encourage keeping needles in a safe place. Addressing these issues keeps embroidery fun and stress-free for kids.
Encouraging Creativity
Encouraging creativity in kids through embroidery kits sparks joy and innovation. These kits offer a hands-on experience that fosters artistic expression. Children learn to create unique designs while developing patience and focus. Embracing creativity helps them discover new skills and build confidence.
Personalizing Designs
Personalizing designs allows kids to express their individuality. They can choose patterns that reflect their interests and personalities. This freedom encourages them to experiment and create unique pieces. Personalization makes their work more meaningful and special.
Exploring Color Combinations
Exploring color combinations introduces children to basic color theory. They learn how different shades work together to create harmony or contrast. This exploration enhances their understanding of colors and develops their artistic eye. It’s a fun way to boost creativity and imagination.
Incorporating Additional Materials
Incorporating additional materials like beads or sequins adds texture and dimension. Kids can experiment with these materials to enhance their designs. This practice encourages them to think outside the box. It helps them create more dynamic and interesting projects.
Maintaining Interest And Engagement
Keeping kids interested in embroidery can be a fun journey. Their minds are curious, eager to learn and create. The key is to maintain their engagement throughout the process. Here, we explore some practical tips to ensure kids remain excited about their embroidery projects.
Setting Achievable Goals
Start with simple patterns that are easy to follow. Avoid complex designs at the beginning. Kids need to feel a sense of accomplishment early on. This boosts their confidence and encourages them to continue. Break down tasks into small, manageable steps. Celebrate each completed step to sustain their interest.
Rewarding Progress
Recognize their efforts with small rewards. It can be stickers, a favorite snack, or extra playtime. Rewards create positive reinforcement. They motivate kids to keep going. Celebrate both big and small milestones. This helps in maintaining their enthusiasm for embroidery.
Interactive Learning Methods
Incorporate interactive activities to enhance learning. Use storytelling to teach about different stitches. Relate each stitch to an exciting story. Engage them with colorful visuals and step-by-step guides. Hands-on activities make learning fun. Encourage them to explore and experiment with colors and patterns.

Credit: www.amazon.com
Frequently Asked Questions
What Age Is Suitable For Embroidery Kits?
Embroidery kits are great for children aged 6 and above. They help develop fine motor skills and creativity. Always supervise younger children to ensure safety with needles and other small parts. Choose kits with large-holed fabrics and blunt needles for beginners.
How To Choose An Embroidery Kit For Kids?
Select a kit with simple patterns and bright colors. Ensure it includes all necessary tools and easy-to-follow instructions. Kits with pre-printed fabric designs are ideal for beginners. Always check age recommendations on the kit packaging.
What Materials Are Included In Kids’ Embroidery Kits?
Most kits include fabric, embroidery thread, needles, and a hoop. Some may also offer patterns or pre-printed designs. Ensure the kit has child-safe needles and easy-to-use materials. Instructions should be clear and tailored for young beginners.
How Long Does It Take To Complete A Kit?
The completion time varies based on the kit’s complexity and the child’s skill level. Generally, simpler kits can be finished in a few hours. More intricate designs might take several days. Encourage kids to take breaks to avoid frustration.
Conclusion
Starting an embroidery kit for kids is simple and fun. Choose colorful threads and easy patterns. Kids love creating and learning new skills. Embroidery boosts creativity and patience. It’s a great way to bond and relax. Make sure to guide them gently.
Celebrate their progress and finished pieces. This hobby can grow with them over time. Enjoy these special moments together. Remember, the journey is as important as the result. Let their imagination run wild and watch them shine. Happy stitching!


